My DIY Cold Plunge Setup: What Works and What Doesn’t
After hours of researching the best DIY cold plunge setups, I landed on the perfect solution.
In this article, I’ll explain exactly how I made my choice, walking you through my decision-making process, product picks, costs, step-by-step instructions, and potential concerns.
If you want a tough cold plunge that can handle any weather, works great, saves space, and looks good, this guide is for you. I can guarantee you’ll be glad you did.
Choosing the tub, chiller, and pump
Choosing a cold plunge tub and water chiller was tough. There were many options, and all the companies made the same claims.
My goal was to find out what really works. So, here’s what I did: I watched hours of cold plunge reviews on YouTube, read tons of articles and testimonials, and ordered some different cold plunges to test them for myself.
I even talked directly to the companies making these products.
Key Decision Factors
My final decision came down to three things:
- Temperature control
- Durability
- Maintenance
These were crucial because I needed something that could handle the brutal Louisiana weather – extreme heat, rain, and sun.
The Winning Combo
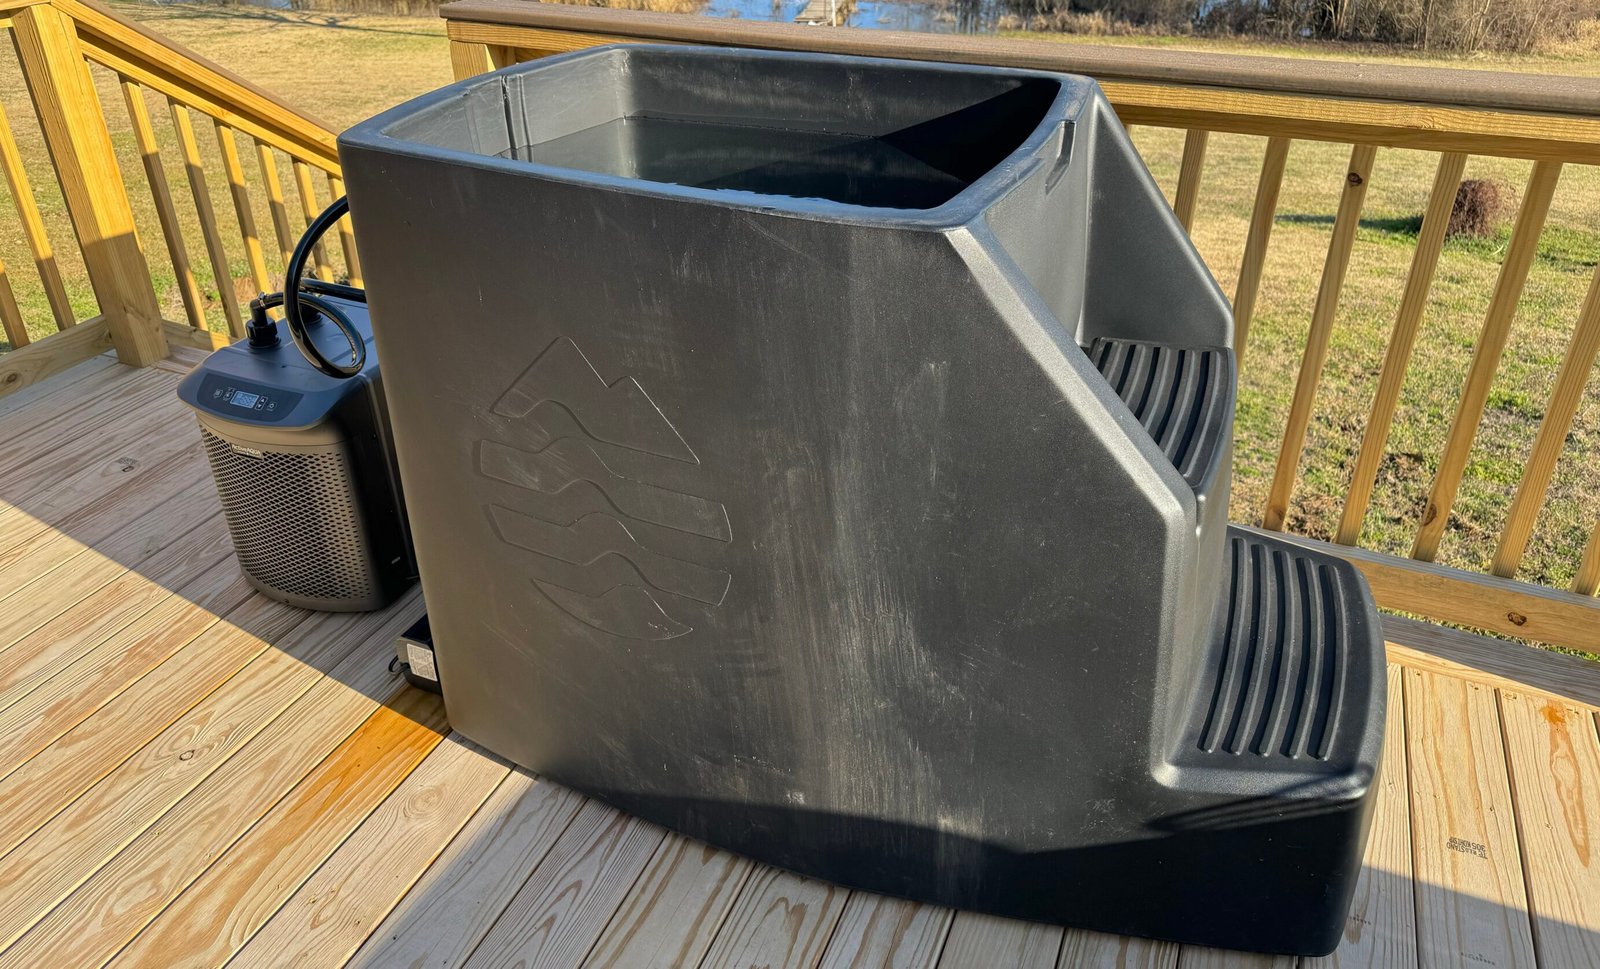
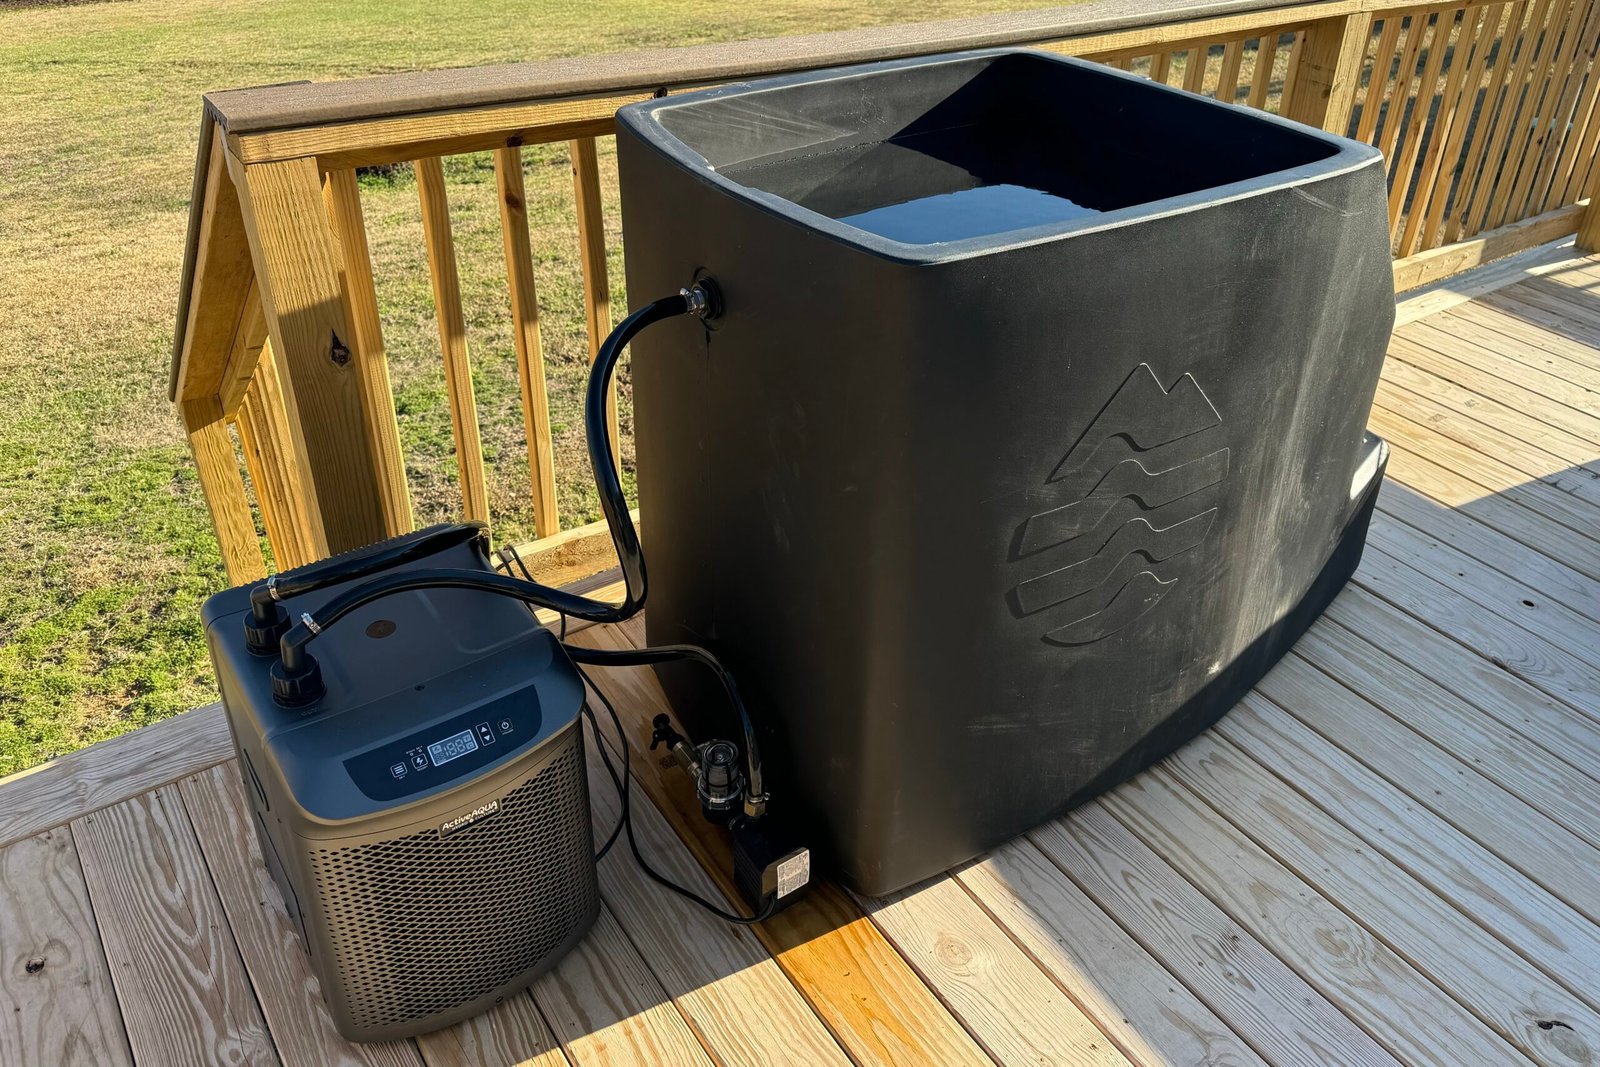
The Ice Barrel 500 paired with the Active Aqua ½ HP chiller checked all the boxes.
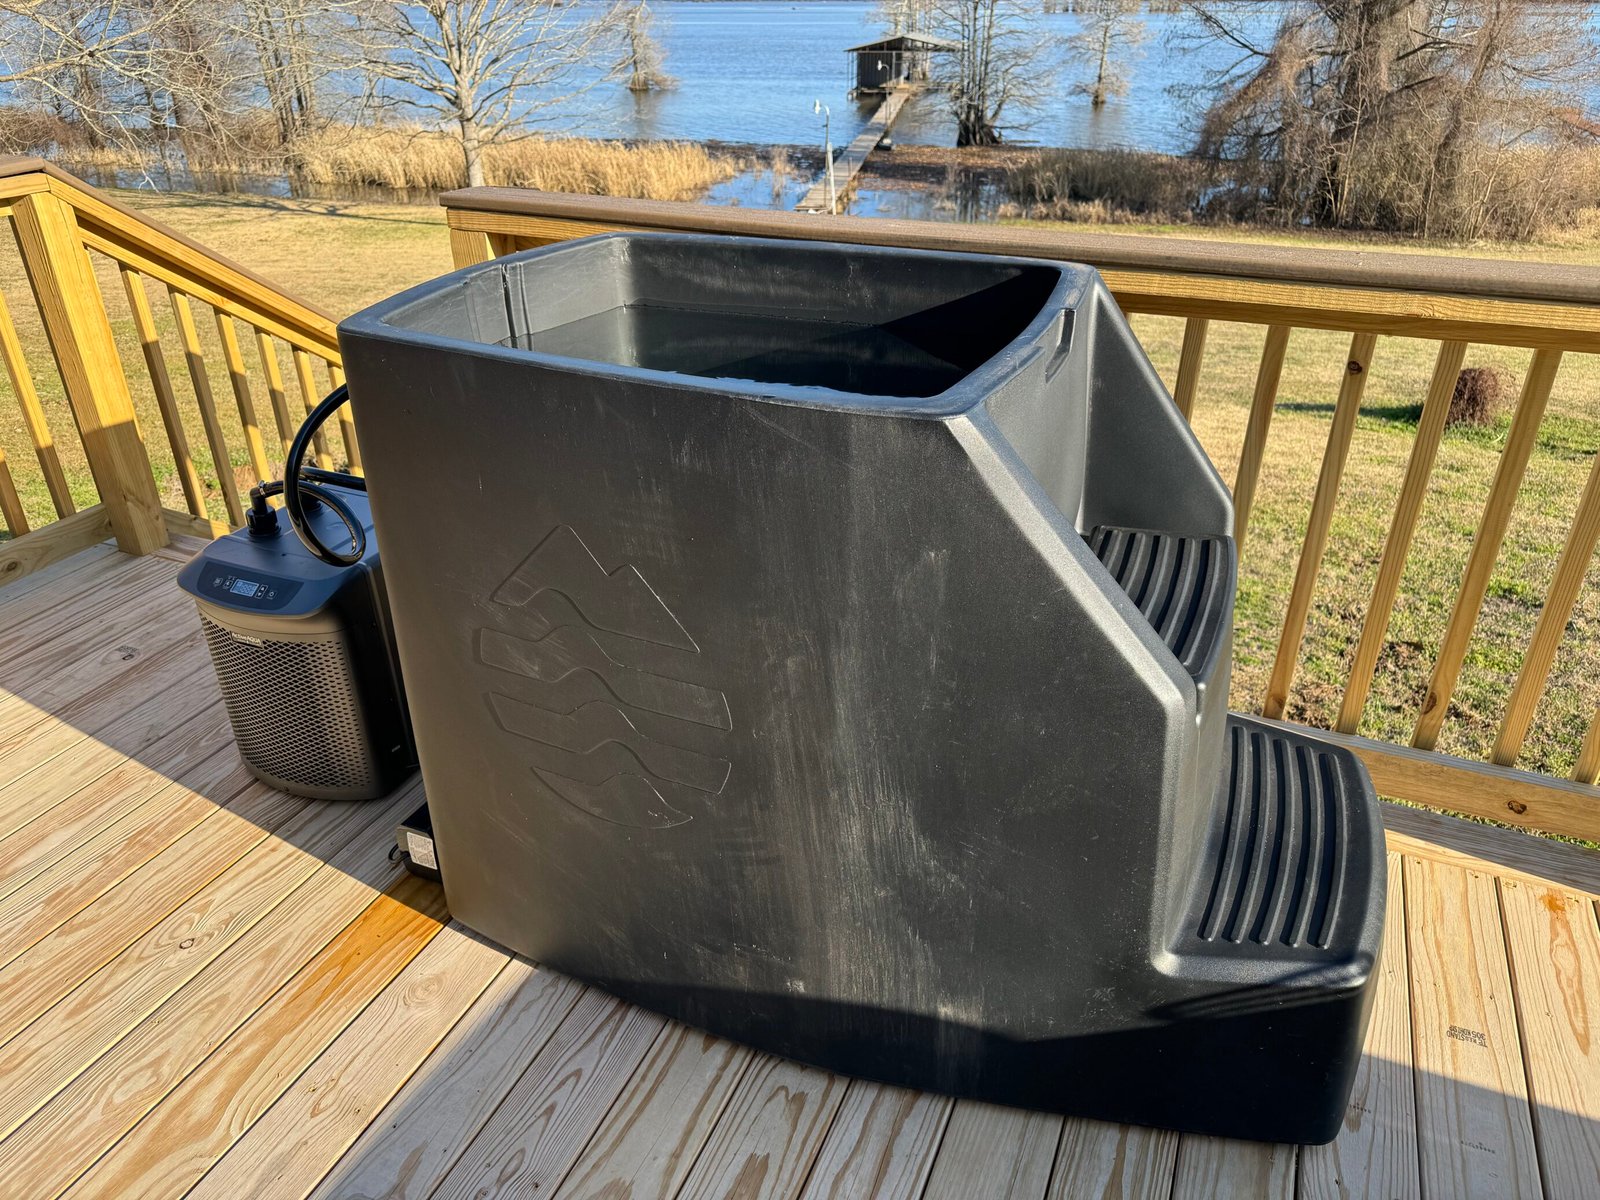
Since Ice Barrel’s tubs were originally built to be cooled with ice instead of water chillers, I knew the insulation was top-tier. They’re made of strong plastic and don’t have any complicated parts that would make maintenance a headache.
The Active Aqua ½ HP water chiller has great cooling power (down to 37°F (2.7°C)), works outside, is simple to use, and has great reviews from credible DIY cold plungers.
Why other options were inferior
Other cold plunge tubs were too expensive, took up too much space, were too heavy for my back deck, were not insulated well, were not UV resistant, or were hard to move around. And most of them weren’t compatible with the chiller I decided on.
Other water chillers were too costly or had bad reviews about breaking down quickly.
Learning from the experts
The real breakthrough came from learning from others who had already built their own cold plunges. Why start from scratch when others have already figured it out?
That’s how I found David Maus Jr.’s YouTube channel. His DIY cold plunge videos became one of my go-to resources. If you want more helpful tips about health and wellness, check out his channel. He gives honest, straightforward advice.
After nailing down the perfect cold plunge strategy, it’s time to get into the nitty-gritty of exactly what you’ll need to bring this project to life.
What You’ll Need
Here’s every component needed for my exact build:
Essential Parts
These are the non-negotiable items needed to have a functioning cold plunge system:
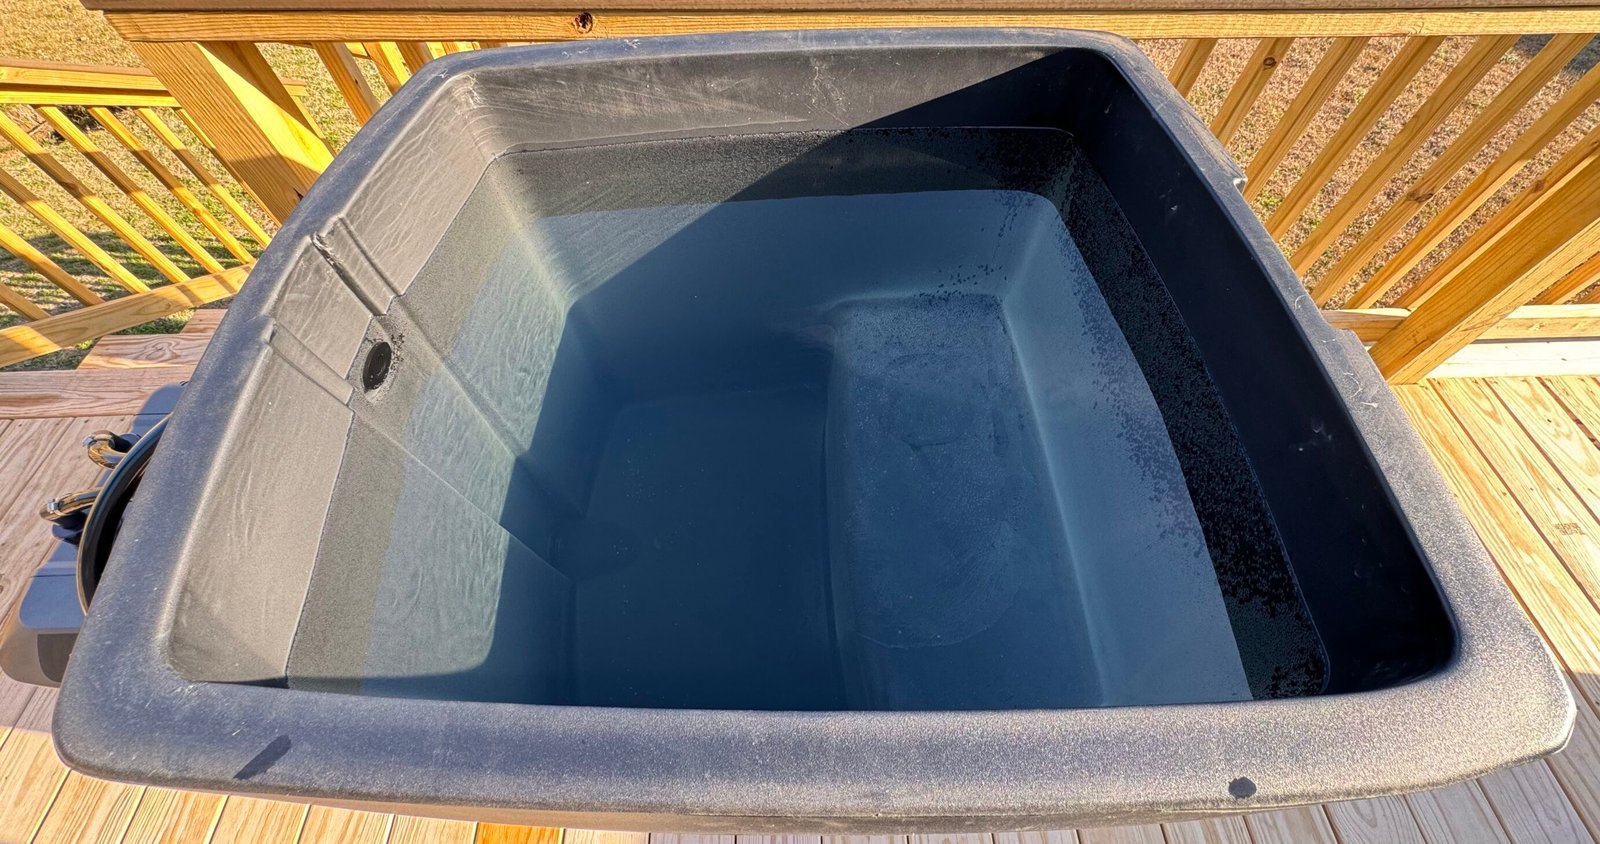
- Tub (Ice Barrel 500)
- Water Chiller (Active Aqua ½ HP)
- Pump (Danner Aqua-Mag 950 GPH In-Line)
- Strainer (¾” Female NPT In-Line)
- Tubing (Active Aqua ¾”)
- 1 T Fitting (¾” female on all sides NPT)
- 3 Hex Nipples (¾” x ¾” male all sides NPT)
- 1 Male Hose Barb (¾” barbed hose x ¾” male NPT)
- 1 Female Hose Barb (¾” barbed hose x ¾” female NPT)
- 4 Hose Clamps (¾” – 1″ Tube Clamp)
- Outdoor GFCI Cord (3 ft. GFCI Extension Cord)
The cost for the essential parts is roughly $2,866.
Nice-to-Have Additions
While not strictly necessary, these extras will level up your cold plunge experience and make maintenance a lot easier:
- Skimming Net (Penn-Plax)
- Water treatment (2-in-1 Stabilizer and Conditioner)
- Food Grade Hydrogen Peroxide (Essential Oxygen 3% USP)
- Hose Filter (Camco)
- Floating Thermometer (Inpool)
- Cleaning Brush (Hobbyin)
The cost of the highly recommended additions is roughly $115.
Tools Needed
- Flathead screwdriver
Cost Breakdown
The total cost for my exact setup, which includes the essential parts and nice-to-have additions, is roughly $2,981. (amazon prices fluctuate)
*This does not include shipping costs
Step-by-Step Setup Guide
1. Get your supplies
Order everything listed in the previous section. Expect a 3-week delivery for the Ice Barrel 500. Everything else should take less than a week to arrive.
2. Choose the perfect location
Your cold plunge setup requires specific space considerations:
Space Requirements
- 4 x 5 square feet if the water chiller is placed beside the ice barrel
- 7 x 3 square feet if the water chiller is positioned in front of the pump
Location Checklist
- Close to an electrical outlet
- Covered area (protected from direct sunlight and rain)
- Flat, level ground (concrete is ideal)
Important Weight Considerations
Warning: Wooden decks need extra attention. This setup weighs around 1,000 pounds when filled, and that’s before you even get in. Make absolutely sure your deck can handle that weight without buckling.
3. Prepare for assembly
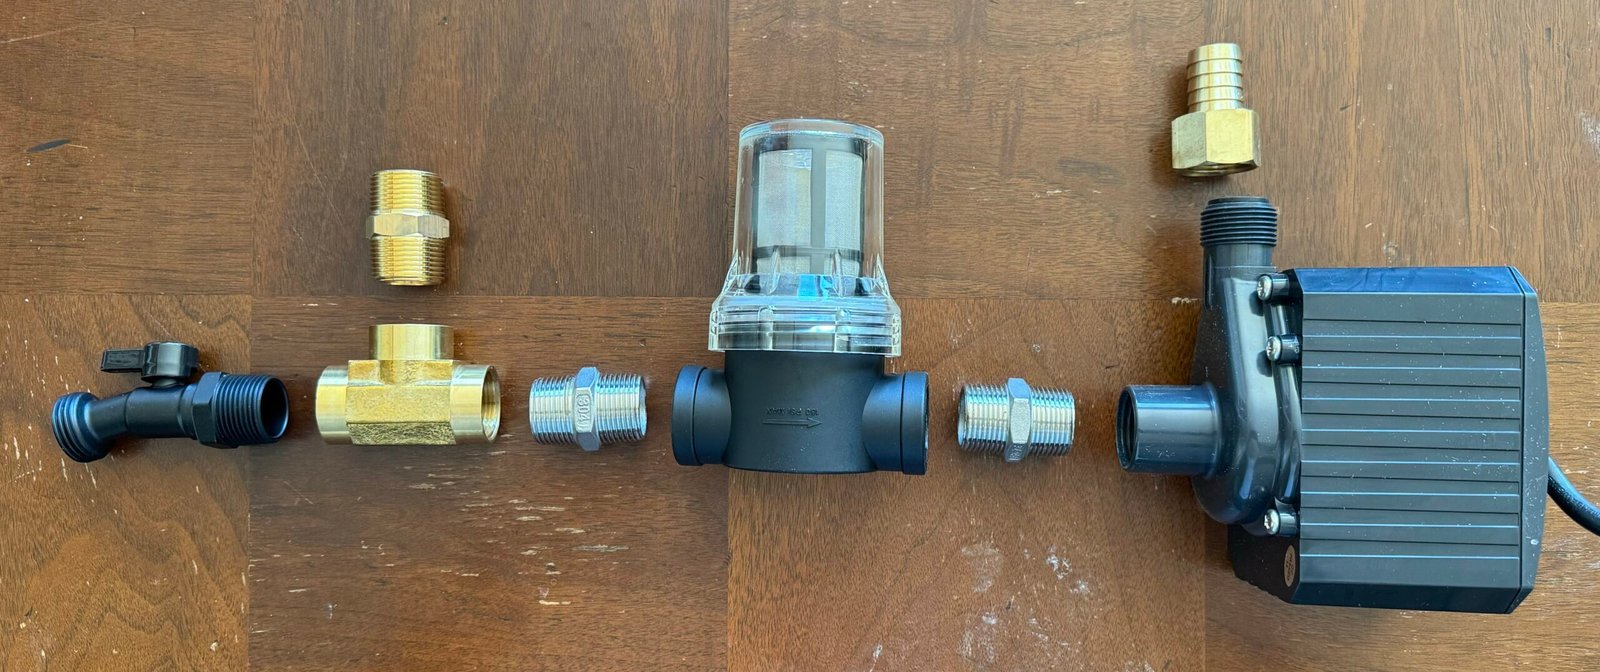
Lay out all parts before beginning. This simple step will save you from potential frustration and unnecessary disassembly later.
4. Assemble the pump configuration
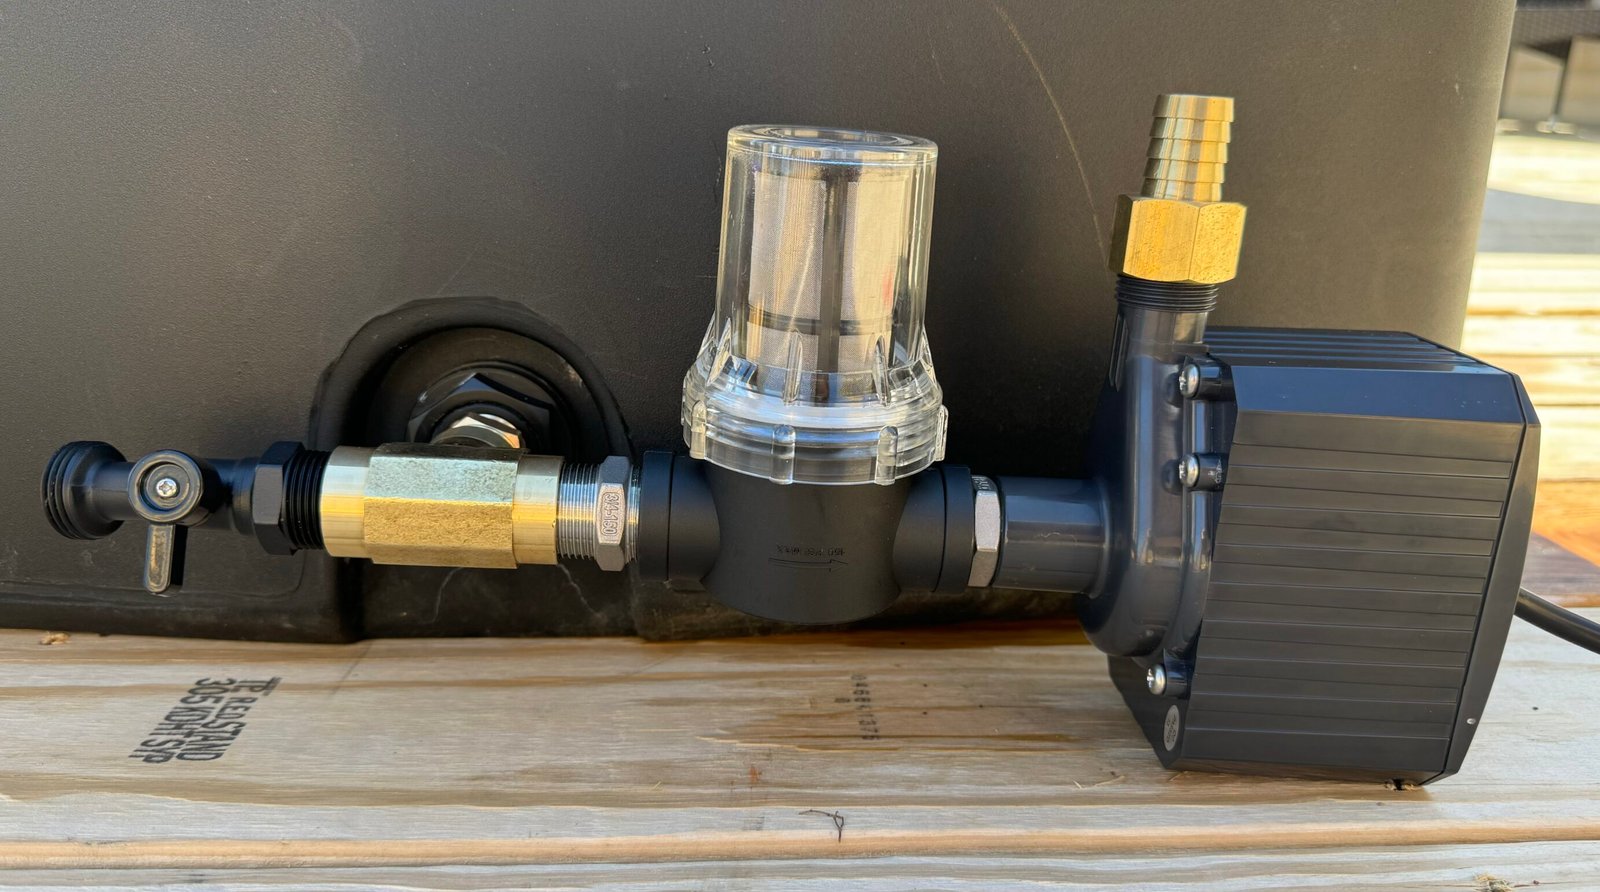
Pump Connection Steps
- Connect the first hex nipple and female barb to the pump
- Attach the strainer (ensure arrow faces toward the pump)
- Connect the second hex nipple to the strainer’s other end
- Attach the T Fitting to the second hex nipple
- Connect the included drain spout to the T Fitting’s other side

Tub Connection Steps
- Connect the third hex nipple to the tub’s outside bottom
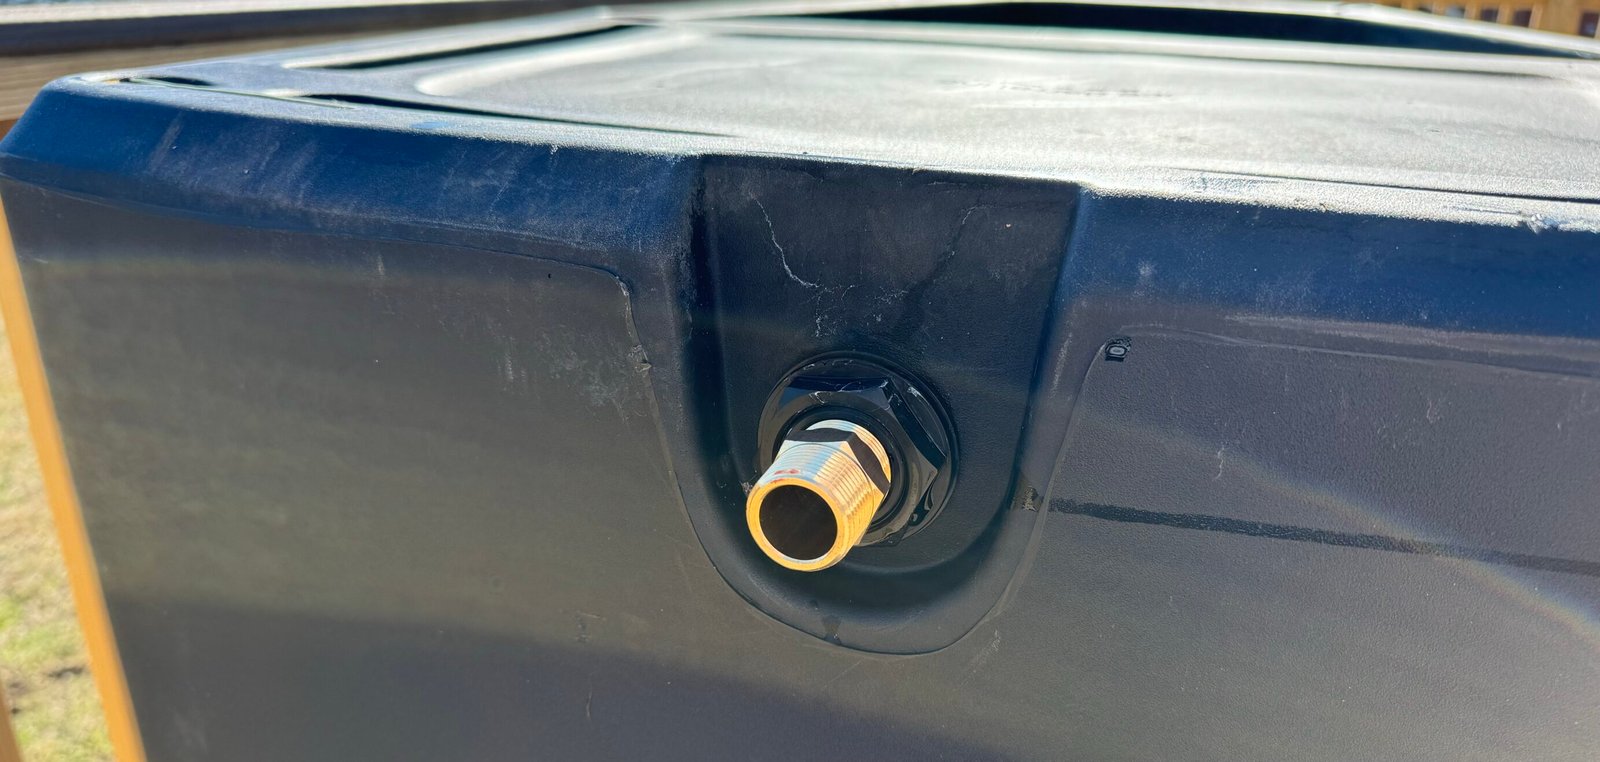
- Attach the male barb to the tub’s outside top
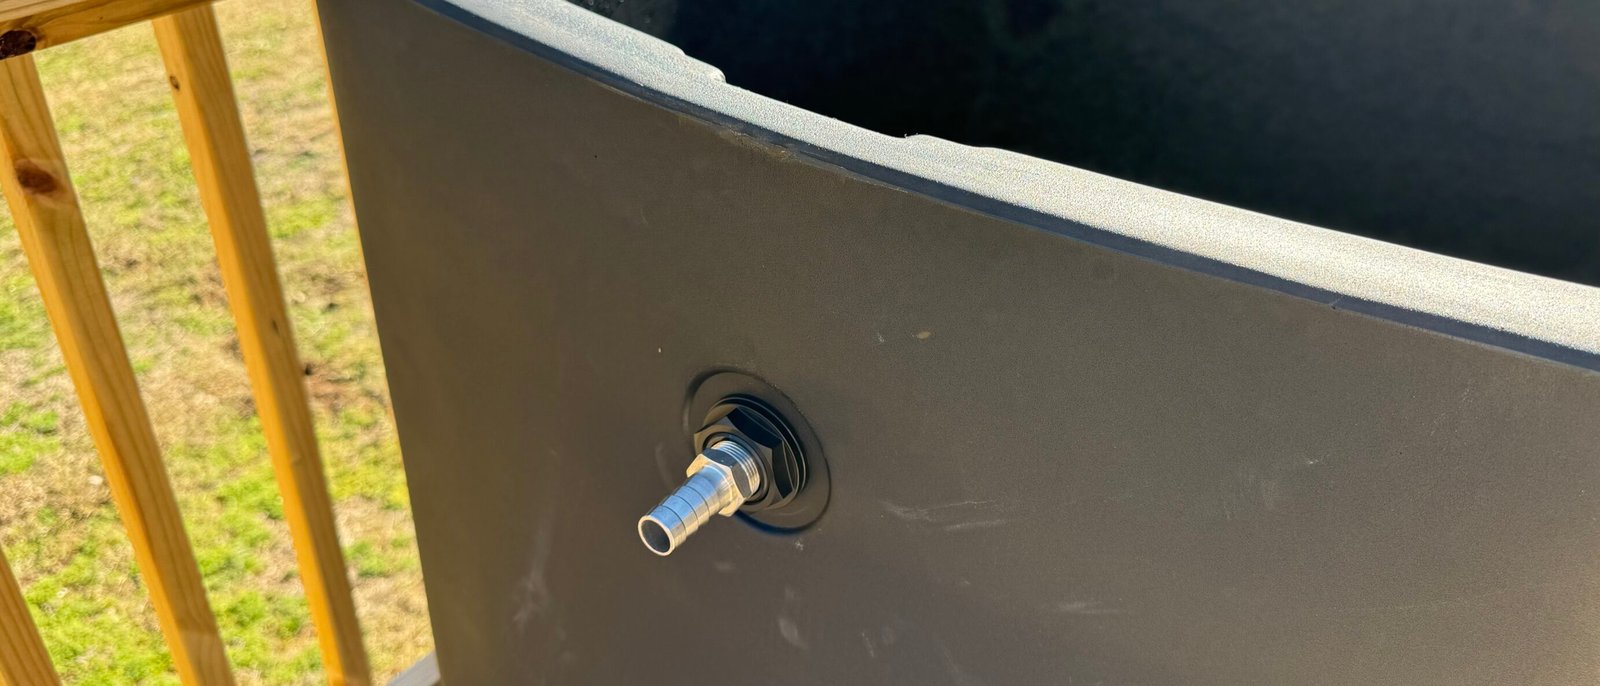
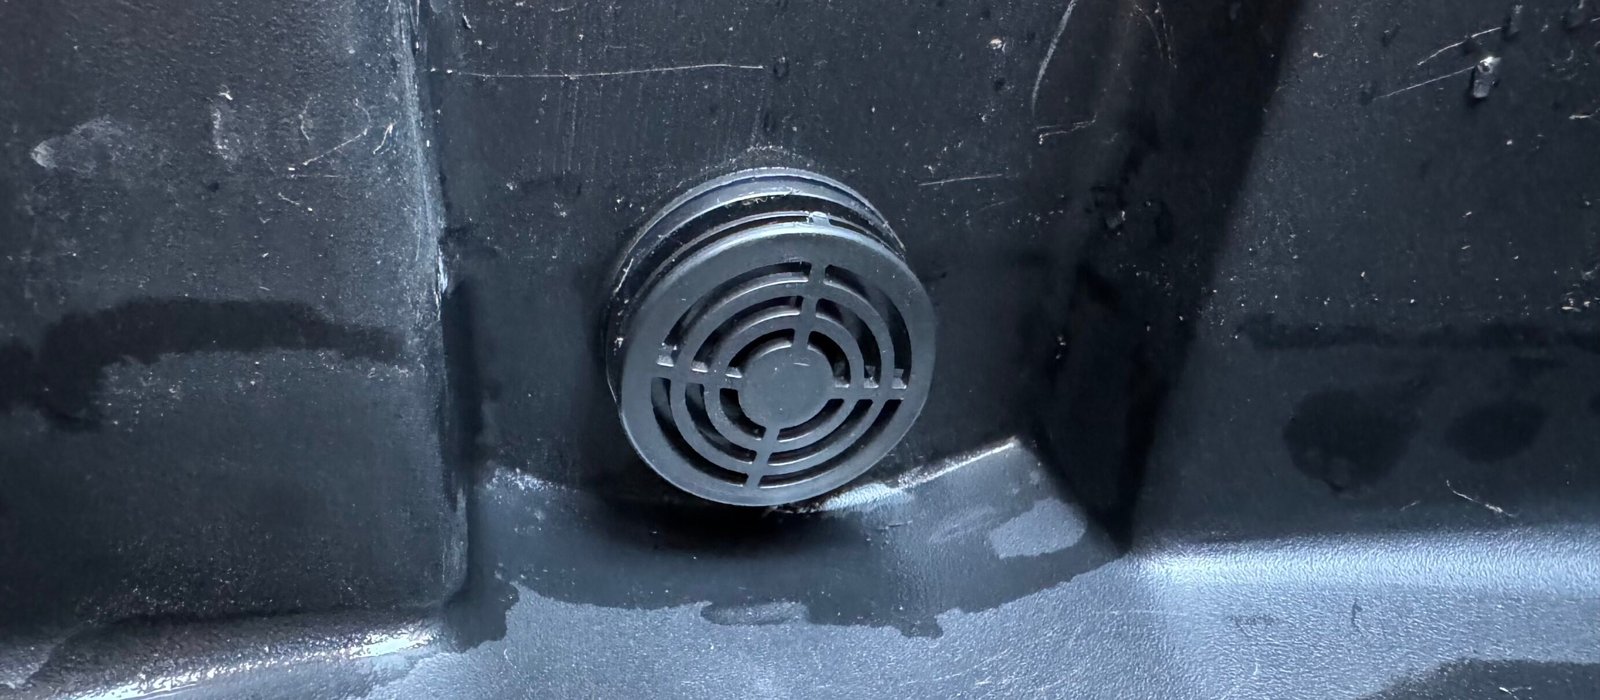
- Climb inside the tub to install the included pre-filter to the inside bottom connection
Pro Tip: Wrap plumber’s tape around threads to prevent leaking
5. Attach pump configuration to Ice Barrel 500
Caution: This step requires two people due to the tub’s weight.
Flipping and Connecting
- Remove the clear cap and mesh filter from the strainer (or else it won’t screw on)
- Carefully flip the tub upside down (104 pounds empty – get help!)
- Attach pump configuration to the hex nipple at tub’s outside bottom
- Ensure the pump configuration is parallel to the ground and facing right side up
- Carefully flip the tub back. Don’t let tub flop down, or the pump setup may break
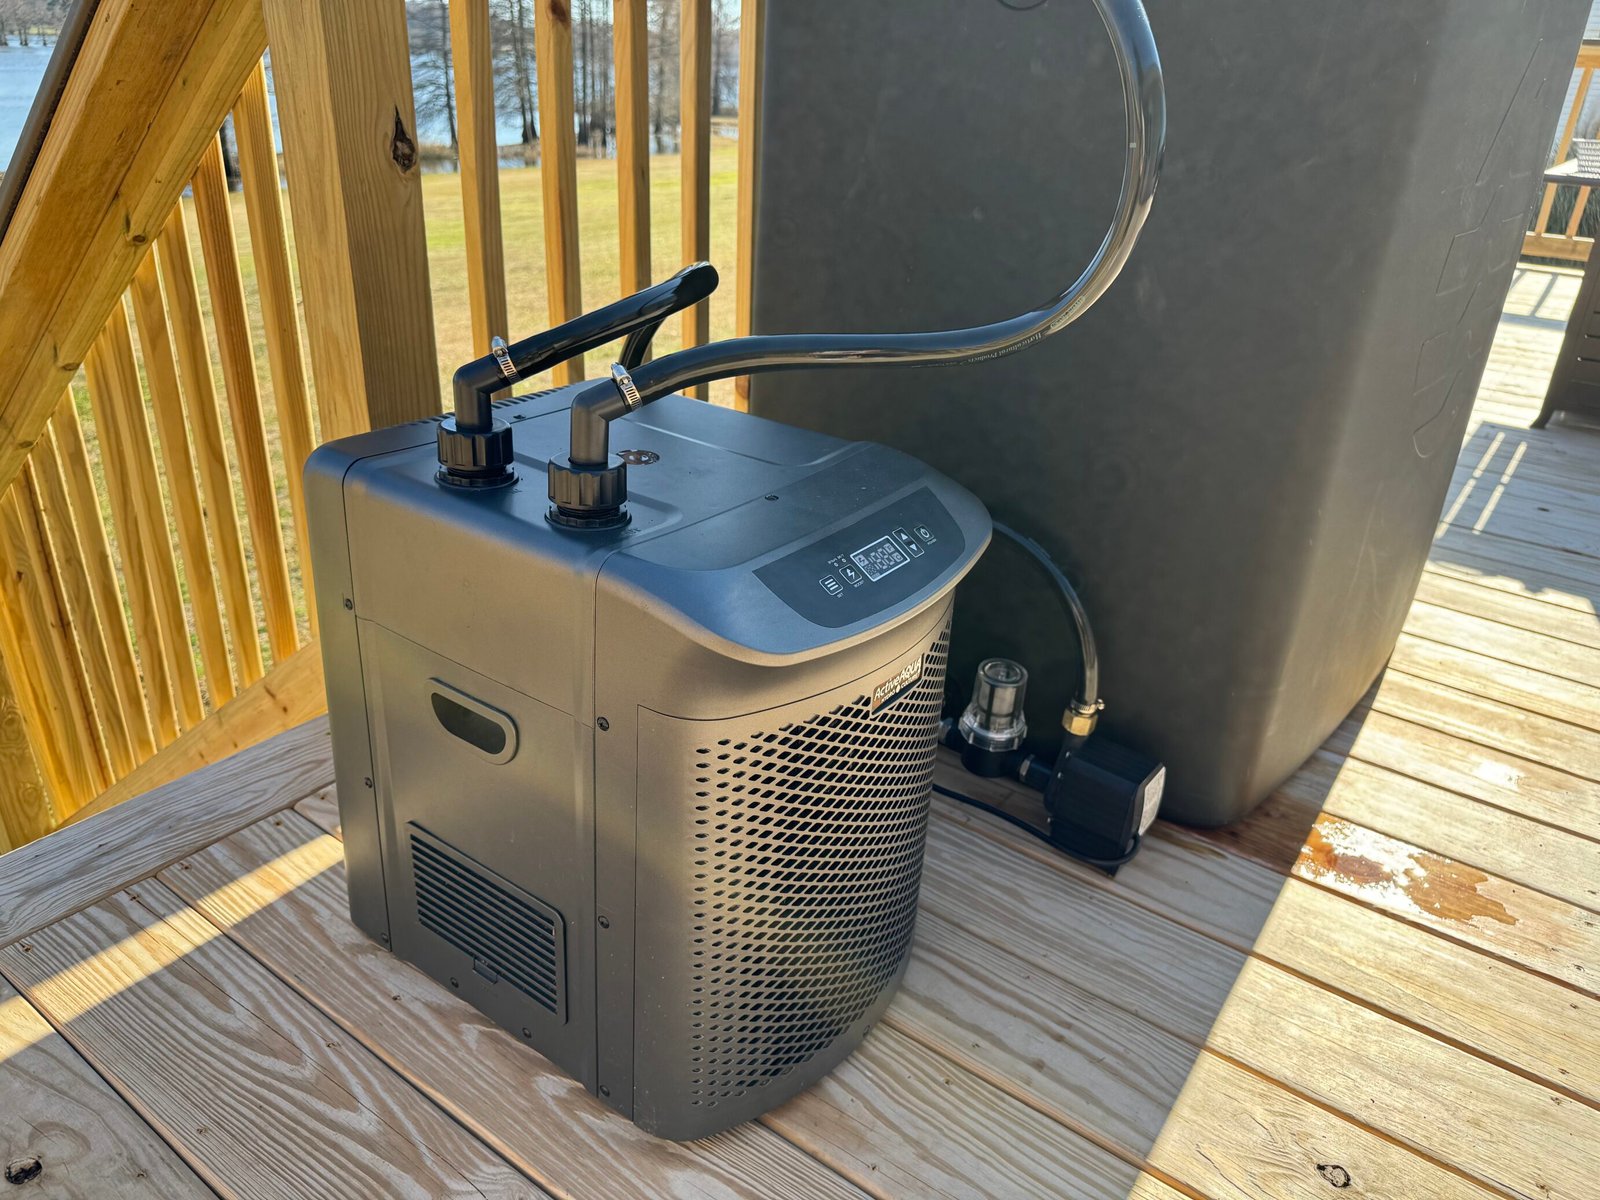
6. Connect pump and water chiller
Now for the easy part.
Positioning
- Place chiller 6-12 inches away from the tub
- Install ¾” plastic screw-on barbs (included with chiller) to the chiller
Tubing Installation
- Measure ‘IN’ Connection
- Stretch the black tubing from the ‘IN’ hole on top of the chiller to the top of the pump
- Add 10 extra inches of slack
- Cut the tubing at this length
- Measure ‘OUT’ Connection
- Stretch the black tubing from the ‘OUT’ hole on top of the chiller to the male barb on the top, outside of the tub
- Add 10 extra inches of slack
- Cut the tubing at this length
- Prepare for Installation
- Slide one hose clamp onto each end of the cut tubes
- Carefully slide the tubing over the barbs until it cannot slide further
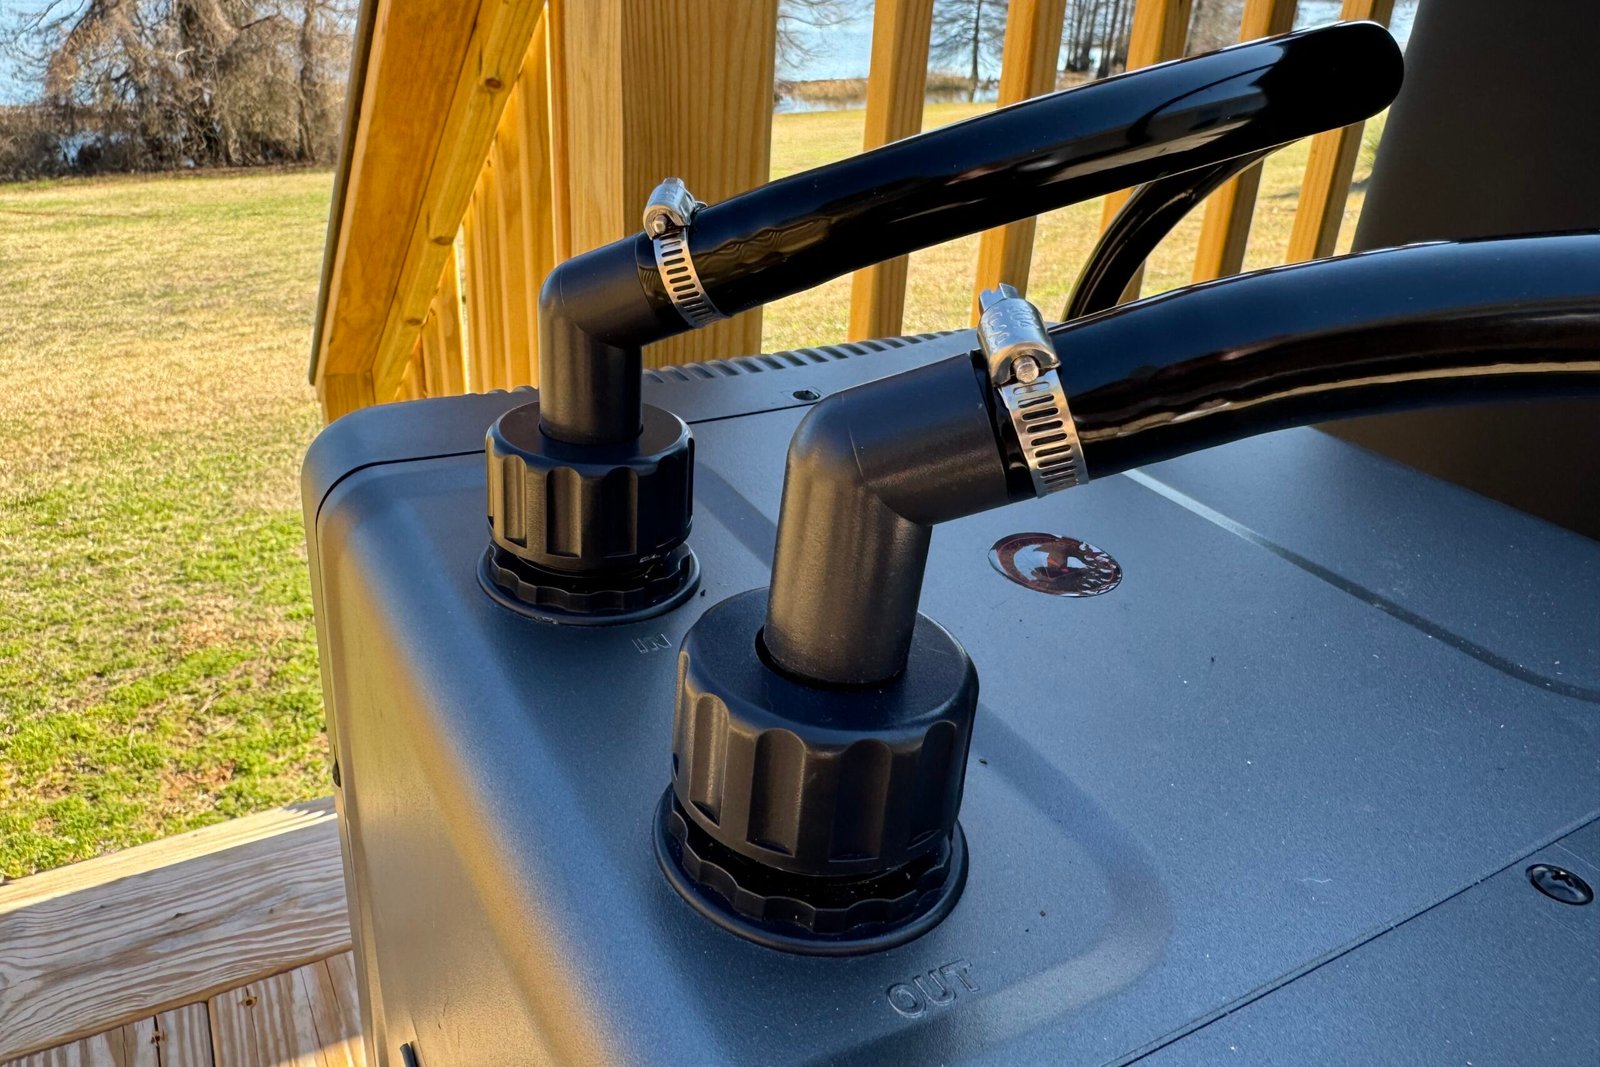
* The extra slack ensures flexibility and prevents tension in the connections
- Secure Connections
- Use a flathead screwdriver to tighten the hose clamps at the end of each tube
- Ensure a snug fit to prevent any potential leaks
7. Test everything
- Attach hose filter (optional) to garden hose
- Fill tub with 1 foot of water to fully cover the intake valve

- Plug in GFCI cord directly into outlet
- Connect water chiller and pump cords directly to GFCI cord
- If set up right, water flows in the bottom hole and out the top
- If that’s the case, continue filling to 4-6 inches from the top
Pro Tip: Use the included lid to hold the hose in place while filling the tub.
8. Add Maintenance Chemicals
Now that everything is in place, you can add the chemicals.
- Add ½ cup food-grade hydrogen peroxide
- Add 3 drops of stabilizer

- Close lid
- Let chemicals circulate for 1-2 hours
9. Enjoy Your Cold Plunge!
Finally, your DIY setup is complete. Time to get cold!
Optimizing Your Cold Plunge
Maintain optimal water temperature by:
- Keeping the lid on when not in use
- Positioning the tub and chiller away from direct sunlight
Sanitation & Maintenance
Keeping your cold plunge clean requires a multi-step approach:
Water Treatment Methods
- Add food-grade hydrogen peroxide to the water
- Use a stabilizer to maintain water quality
- Use a skimming net to remove debris
- Consider an ozone filtration system for advanced bacterial control
Click here to learn how to keep your cold plunge clean year-round.
Winterization Strategies
When temperatures drop below freezing, bring the water chiller and pump inside. Avoid leaving equipment exposed to freezing temperatures, as mechanical components can malfunction or break.
They break because of water expansion and damage to internal mechanisms during freezing.
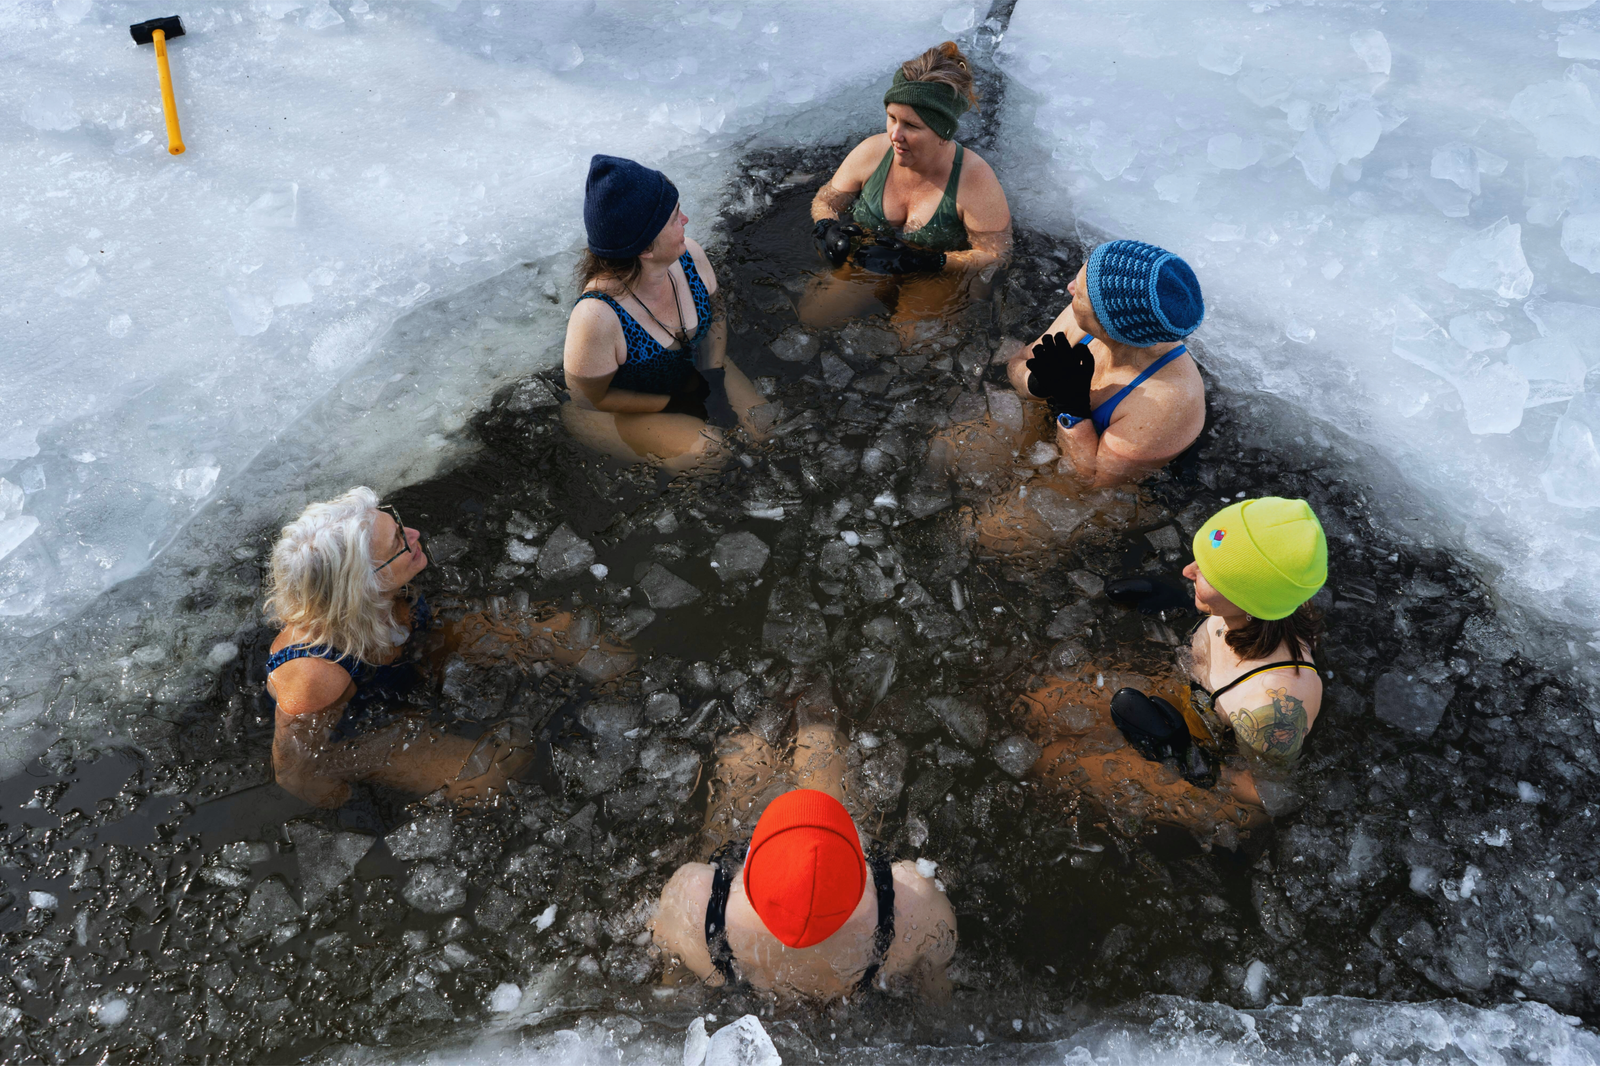
Cold Climate Cold Plunging
If you live in a colder region, you can still enjoy your ice barrel without the chiller and pump.
Leave the tub lid off for a few days to cool the water, or use ice to maintain the desired temperature.
Troubleshooting & Common Issues
Dealing with Leaks
Always wrap the threads of your components with plumber tape before assembly. This can stop most leaks before they start and prevent water damage.
Pump Troubleshooting Guide
When your pump isn’t working, don’t panic. There are several steps you can take to diagnose and resolve the issue.
Power Supply – Ensure the pump is plugged in and the outlet is working. Try a different outlet or reset the breaker if needed.
Clogged Intake or Filter – Debris can block water flow. Clean the intake and filter to see if that fixes the issue.
Air Lock – Sometimes air gets trapped in the pump, preventing it from working. Try tilting the pump or briefly unplugging and plugging it back in.
Frozen or Overheated Pump — Extreme temperatures can cause pumps to freeze or overheat. If the pump is frozen, let it thaw. If it is overheated, give it time to cool before restarting.
Impeller Issues – The impeller (the spinning part inside) can get jammed. Open the pump and check for blockages.
Reset or Prime the Pump – Some pumps need to be manually reset or primed to start working again. Check the manufacturer’s manual for specific steps.
Pump Lifespan – If none of the above work, the pump motor might have burned out and could need replacement.
Customization Ideas
Everyone’s cold plunge needs are different, so here are some ways to adapt the setup to your specific situation.
Alternative Cold Plunge Tubs
The Ice Barrel 500 isn’t your only option. If you want something different, consider the Ice Barrel 300.
Filtration Considerations
Don’t waste money on extra filters. The current setup – with its strainer, pre-filter, hydrogen peroxide, stabilizer, and skimmer – does everything you need.
These components already keep the water clean and free of debris. An additional filter won’t improve the system and will just cost you more money.
Final Thoughts
This DIY cold plunge is a game-changer for anyone serious about cold water therapy. From choosing the right equipment to setting up a bulletproof system that can handle brutal weather, I’ve broken down every step to help you create a cold plunge that’s built to last.
The Ice Barrel 500 and Active Aqua ½ HP water chiller combination checks all the boxes: great temperature control, extreme durability, and ease of maintenance. I’ve tested this extensively, and it consistently provides reliability.
If you’re on the fence about building a DIY cold plunge, let me be clear: this guide is your roadmap. I’ll continue testing and reviewing cold plunge setups to provide the most up-to-date information, but this build is my favorite.
Debating between materials or stuck on setup? Share your question below, and I’ll help you out!
FAQs
Medical Disclaimer
The information contained in this post is for informational and educational purposes only. It is not intended to provide medical advice or to take the place of such advice or treatment from a personal physician. All readers/viewers of this content are advised to consult their doctors or qualified health professionals regarding specific health questions or before embarking on any new health or wellness routine, including saunas and cold plunging. Neither the author(s) nor the publisher of this content take responsibility for possible health consequences of any person or persons reading or following the information in this educational content. All viewers of this content, especially those taking prescription or over-the-counter medications, should consult their physicians before beginning any cold plunging routine or other health or wellness program.